Saturday, October 11, 2008

Put to Use: Salt Dough.

In a previous post I introduced you to salt dough. So in the spirit of Halloween I've put the salt dough to use and made a cute haunted house and a witch out of some very simple and easy to find supplies.


You can really do any variation you want on these decorations.

The Haunted House

Photobucket

The ghosts were made with the salt dough


The witch
http://s3.photobucket.com/albums/y61/superdobby/?action=view&current=IMG_9781.jpg
The witches head was made with salt dough

Look forward to tutorials on both of these projects

Wednesday, August 6, 2008

Salt Rocks...

This is one of my favorite recipes for a quick and easy decorative salt dough. You can make just about any decoration out of this easy-to-make dough.

What you'll need:
1 cup of salt
1 cup of flour
1 cup of water
A bowl to mix in
A microwave safe plate or cookie tray
A microwave or conventional oven

Pour the salt and flour into the bowl you plan on using to mix the ingredients. Gradually add the water (start with 1/2 a cup) and knead the dough. You might have quite a bit of water left over because the amount you mix into the dough depends on the consistancy you want it to be. The dough should be easily pliable but not sticky.

Tip: Don't have regular table salt? Using larger grained kosher salt is fine. Just dissolve the salt in water before you mix the flour in or if you want your dough a little less smooth, mix in the same fashion as you would with regular salt.

Now you're ready to shape your dough. You can either roll out your dough and use cookie cutters to cut out shapes or you can hand shape the dough.

Microwave cooking: Set your decoration on a microwave safe plate. Microwave the dough at 15 second intervals until the dough feels dry and hard on the outside (this usually takes about 45 seconds, but is prone to cracking). If you have a microwave with a tray that does not rotate, microwave at 10 second intervals and rotate the decoration. If you choose to microwave your dough make sure to check on your decoration and add water to any cracked surfaces.

To bake your dough set your oven to 200 degrees farenheit. Adjust baking time according to the size of your decoration. This method is better for larger pieces.

You may also choose to airdry your dough. If you choose this option it is better to sundry it so that the water will evaporate before the flour starts molding.

Properly dried decorations can last quite a while. The salt dries the flour out enough so that it won't be as prone to molding.

Have fun!

Tuesday, August 5, 2008

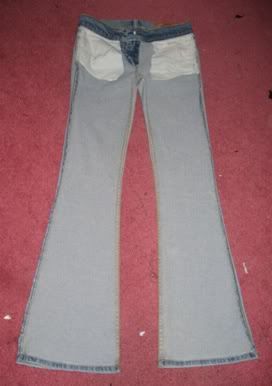
Make Your Flares Skinny

Skinny jeans are definitely a trend right now, but a lot of stores sell them for jacked up prices or people have old flare or bootcut jeans that they love the fit of, but don't like the pantleg style. Making your jeans skinny is just as easy as it looks. You can even make skinny jeans skinnier. All you need is a pair of jeans, a sewing machine (or lots of patience with a needle and thread), and pins. Optional: A fabric marker or pencil and a seam ripper.


There are two easy and well known methods to altering your pant legs.

Method One:

This is what I like to call the "pants on pants" method.
For this you'll need another pair of skinny jeans that you already like the fit of.


On a flat surface large enough to fit a pair of pants (the floor works great for this...Even Better: A carpeted floor so the clothes don't slip around while you're working!) lay the pair ot pants you plan to alter inside-out and flat.
Photobucket

Next, lay the pair you already like on top of the pants you plan to alter. I prefer to lay this pair out inside-out as well because it stays flatter and you can include seam allowances.
Photobucket

Lay the top pair out with the outter seam of the leg and crotch area of the pants lined up as much as possible. Using the pins or fabric pencil/marker (in this tutorial I used both) trace the inseam of the skinny jeans onto pair you plan to alter. Pin along the lines on the pant legs make sewing easier and avoid uneven legs or seams.
PhotobucketPhotobucket

Tip: Although you don't have to sew along the inseam of the pants (you can taper the outter seam), I prefer to sew the inseam because it is easier to hide mistakes.

Photobucket
Now you can sew! Remember to keep the line as straight as possible and gradually meet with the orignial inseam of the pants.

Tip: If you are pinning parellel to (or on) the line, remember to remove pins as you sew to avoid breaking your needle on the plastic pinheads or having the machine foot getting caught on them. If you position the pins perpendicular to the line you sew you don't need to worry about this.

Before you cut the excess fabric off, try your newly altered pants on to make sure that you didn't sew the legs too tightly. Try them on inside-out because the excess fabric on the inside can sometimes fool you into thinking they're too tight. They'll always be slightly tighter when worn right-side-out depending on how much fabric you leave on the seam so its always better to sew them a bit looser. If you're satisfied with the results trim the excess fabric off.


PhotobucketTip: Leave at least 1/8 inch of seam allowance so your seams don't slip and unravel.

Method Two:

The "wear and pin" method.

This method may be a little trickier, btu comes in handy for those who do not already have a pair of skinny jeans to copy off of.

Put the pair of pants you plan to alter on inside-out. It is usually better to pin while standing up so the seams stay even. Pin the inseam down your leg as tight as you would like the jeans to be (I like mine very tight, so I pin fairly close to my leg. Remember, pin slightly looser than you would like the pants to fit (give it about 1/8 inch) to allow room for the seam allowance and because the pants will fit slightly tighter when you wear them correctly.
Photobucket

Tip: Get someone else to pin them for you. Even the most flexible people may find pinning their own pants a difficult action. It only takes about a minute (or less) to pin them.


Once you pin you're ready to sew. Don't worry if the pins aren't in a very straight line. Just try to make a straight and gradual line from your first pin to your last pin.
Photobucket
Try them on. Cut the excess fabric off if you're satisfied with the results.


Finished pants:
The Left leg is method one, the right leg is method two.


Photobucket

Welcome

Welcome to Dotted With Arts blog dedicated to DIY arts and crafts, sewing, hair & makeup tips, and recipes and tips for baking (and other edible art forms). I'll be writing about just about anything that comes to my mind if I think it might be useful to the artsy fartsy diyers out there in internet land.

Want to see a specific tutorial? Send me an email and if I have the supplies I will write about it asap.

Enjoy.